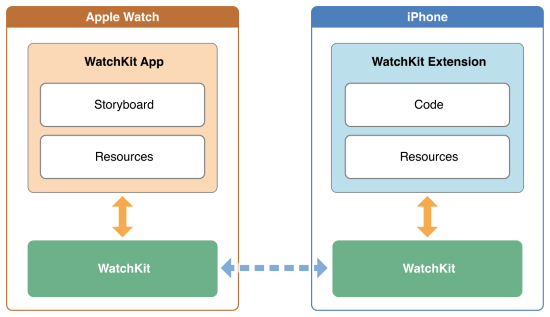
In my last podcast episode, I talked about the Apple Watch Event and also a bit about what developing for the watch is like. WatchKit isn’t something that you can just create as a standalone application. Every WatchKit application must have a phone application. No processing happens on the watch, it is just a “dumb screen” for the application on the phone. So even if the entirety of what you are building is for the watch, the phone component must still be installed. The phone component is the “brains of the operation”.
Here is a diagram of WatchKit architecture from Apple
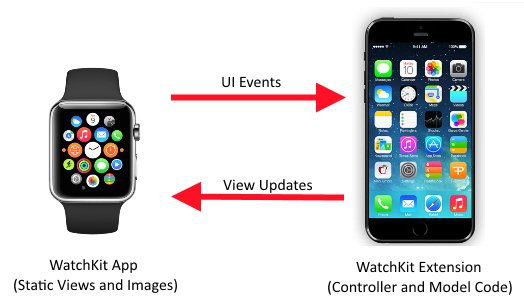
And, here is one that I created to expound on it a little bit:
Let’s walk through making a very simple application. The source for this application is available on GitHub, or you can follow along.
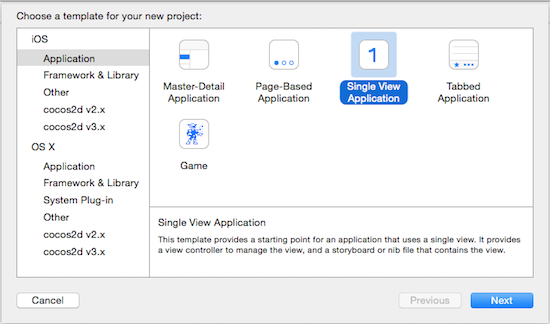
First, we need to make a phone application. You see that WatchKit isn’t any of our options, so I’m choosing to make a Single View application.
At this point, we just have a standard iOS application and XCode appears as it always does.
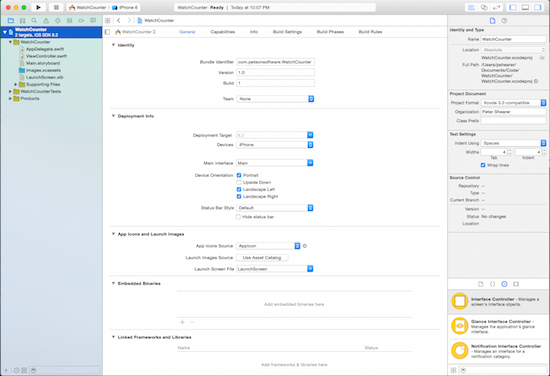
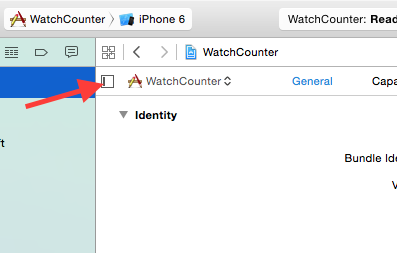
With the project selected in the explorer pane, make sure that your Target window is visible. If not, click this button to show it.
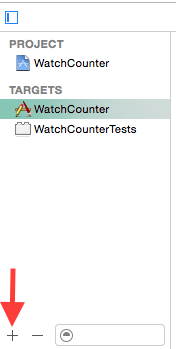
Next, click the plus sign indicated here to bring up the Add Target window.
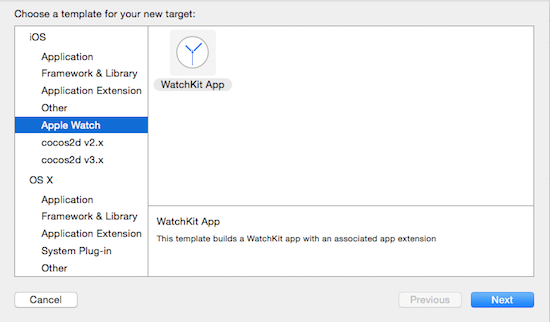
We are going to choose an Apple Watch -> WatchKit App Target Template
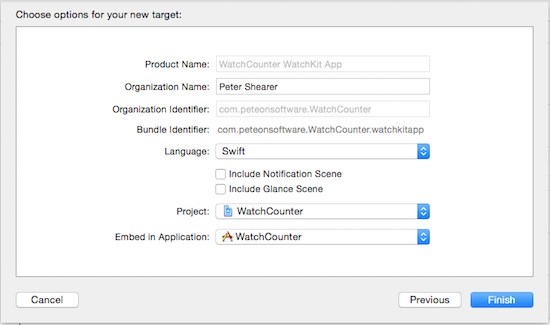
For the options, we are just making a simple application, so leave most of the defaults. We are going to make sure that the checkboxes are cleared next to “Include Notification Scene” and “Include Glance Screen”. If you forget, it won’t be the end of the world. Our Watch Storyboard will just be a little cluttered. Because we wouldn’t be using those screens for this sample, they wouldn’t affect what we’re doing right now.
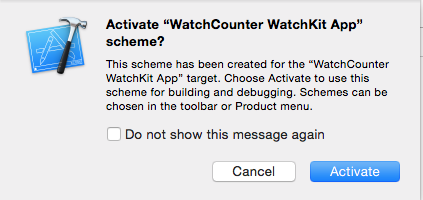
After you are done and click “Finish”, you are presented with this dialog (if you haven’t previously told it to never show again). Click “Activate” so we can continue.
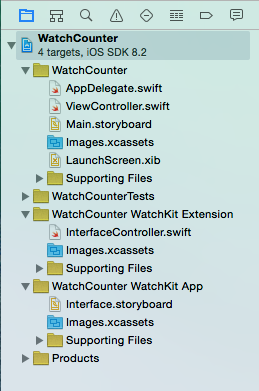
At this point, your project will be changed. Added to our project are two new folders: WatchCounter WatchKit Extension, and WatchCounter WatchKit App. For this project, the only thing we care about in the “App” folder is the Interface.storyboard and the only thing in the Extension folder we need is InterfaceController.swift.
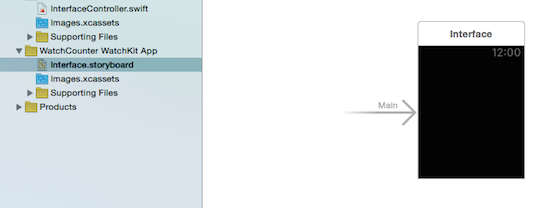
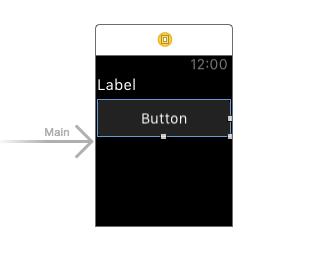
If we click the storyboard, we’ll see this:
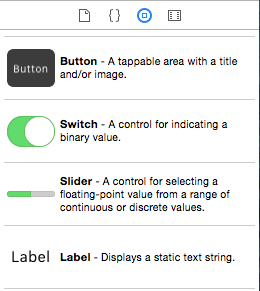
Go to the controls (bottom right of Xcode by default) and find the Button and Label controls.
Drag the label onto the watch storyboard, followed by the button. The watch has a “flow” layout and will just stack the controls on top of each other with no overlap. You don’t have access to auto-layout or precise positioning. There are ways to group some controls horizontally, but for now we can be fine with stacking the controls.
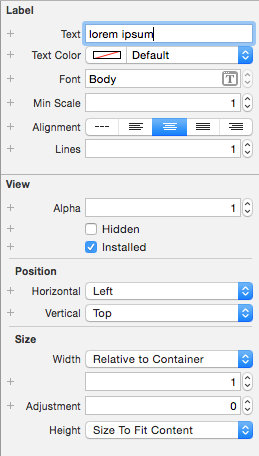
Select the label on the storyboard and go over to the properties window and change the values to the ones that you see here. The label’s text will change when the app starts up, so I just have some text in there so it is easy to see and select while we are working with it visually.
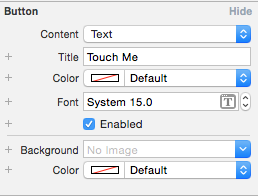
Next, select the button on the storyboard and then set its properties.
Now, if you click the assistant editor button while on the storyboard, it will bring up the code for the view controller side by side.

Click on the label to select it and then hold down control, click on the label, and drag over to the code window and let go right above the awakeWithContext method. A dialog will come up to create an outlet. Name it displayLabel and click to accept.
Next, control click the button and drag over to the code window right below the awakeWitContext method. It will again ask you to create an IBOutlet, but use the dropdown to change to an IBAction, name it buttonWasPressed and accept.
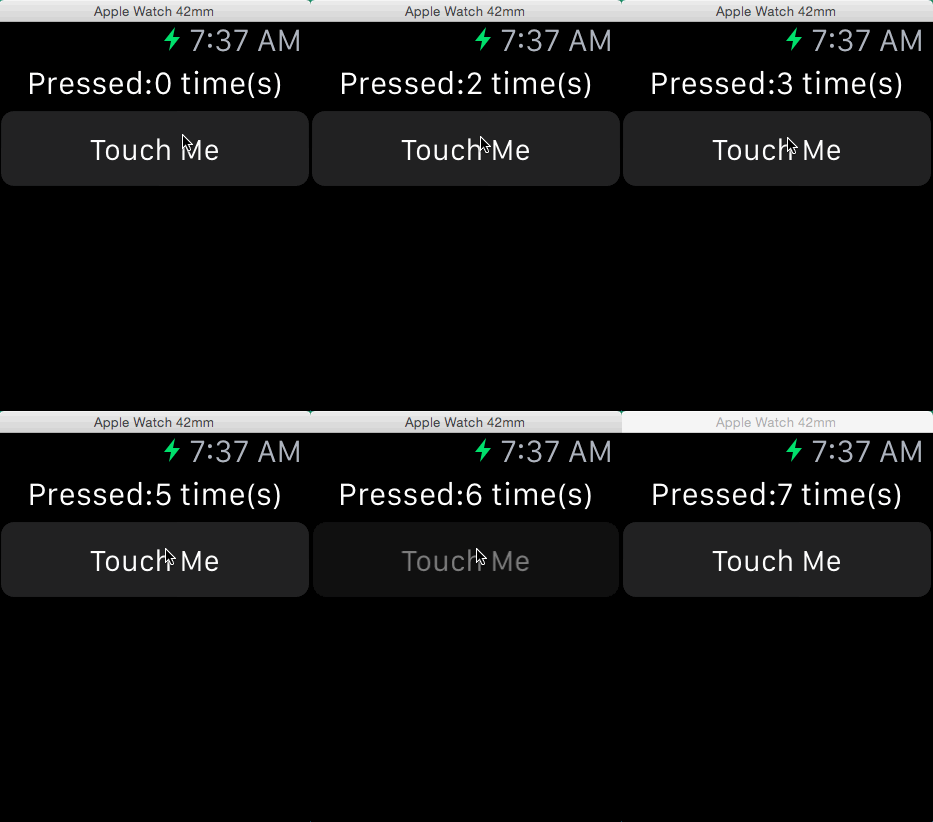
Next, type in the rest of the code shown here. All we are doing is creating a counter variable and then updating the label, keeping track of how many times we clicked. It should be fairly straightforward.
import WatchKit
import Foundation


class InterfaceController: WKInterfaceController {
    @IBOutlet var displayLabel: WKInterfaceLabel!
    var counter = 0

    override func awakeWithContext(context: AnyObject?) {
        super.awakeWithContext(context)

        // Configure interface objects here.
        updateMessage()
    }

    @IBAction func buttonWasPressed() {
        counter++;
        updateMessage()
    }

    func updateMessage() {
        var message = "Pressed:\(counter) time(s)"
        displayLabel.setText(message)
    }
}
Now, make sure that the WatchCounter WatchKit App is still the active schema and you are targeting the iPhone 6 simulator.

When you run it, should should launch the phone and watch simulator and get a watch app up that runs like this:
That’s it. If you have any questions, let me know. Again, if you want to check this out and poke around rather than follow along, the code for this application is available on GitHub.
 Earlier this month, I saw a tweet that kind of got me fired up. It was pushing the same tired arguments about why companies that don’t allow remote working are backwards and dumb. Everyone knows the benefits for the developer in a remote working situation and most people know how having a distributed force can help the company. But, can you turn around and see things from the point of view of companies that don’t allow remote workers? In this podcast, I do just that.

 Today, I was listening to Episode 61 of the
  Recently, I found two “open letters” on the Internet. Episode 36 has me examining their contents and pointing out where I find fault with each. The letter that started it all was from a PM and was aimed at telling developers how to do their job. The rebuttal, from a Developer to a PM, was written to explain how the PM was wrong and how they should do their job. There is actually plenty of wrongdoing in both letters and we’ll take a look at that with the aim of behaving better and having better attitudes in the workplace.


 In episode 35, I cover the Apple Watch Event. Of course, the two-hour event was not just about the watch, but that’s all most people cared about. I talk about what new things that we learned about the watch, some of the apps that are going to be available at launch, and what it is like to actually develop for the thing yourself. I also answer the most pressing question… will I buy one? Check it out and let me know what you think.