 Last month, I started a series about tools and utilities that are good to know with a post about curl. In my most recent CTF post, I had to use CyberChef to help me with one of my steps. That post was already going to be very long, so I didn’t have a lot of time to explain what CyberChef was or how it worked if a reader was unfamiliar. It did, however, seem like a good topic for my next “Core Tools to Know” post, so here we are.
As some background, CyberChef was created by an anonymous worker at GCHQ (Government Communications Headquarters) in England. GCHQ is an intelligence agency and is the current version of the organization (then called GC&CS) that was at Bletchley Park and broke the Enigma Codes. So.. smart folks. Like a lot of high-tech places, GCHQ gives their employees 10% “Innovation Time” and this worker created this tool during that time. They shared it with their colleagues and eventually decided to open source it on GitHub for the world to benefit. So what is it? Let’s take a look.
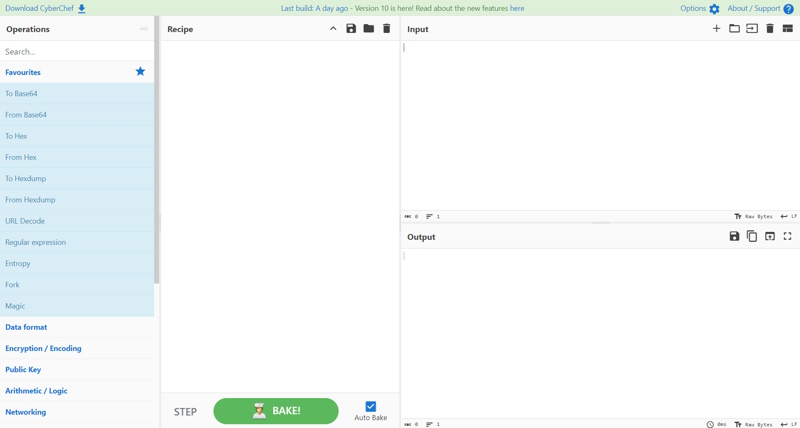
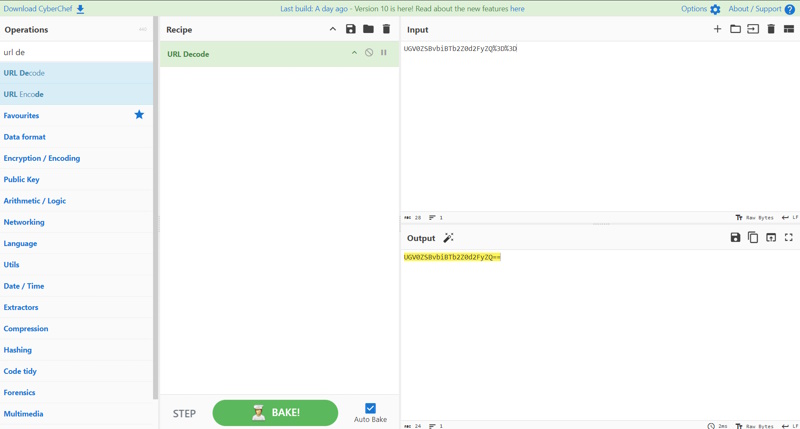
There is a lot going on here, but think of it like a factory or assembly line. In the upper right is where you put the input to the process. In the bottom right is the output. The center column is where you drag the “recipes”, which are the operations that you are going to conduct on the input. The left side shows all of the available recipes/operations that you can choose from. In the upper left is a search box to help you easily find what you were looking for. Let’s say you came across this string: UGV0ZSBvbiBTb2Z0d2FyZQ%3D%3D. If you recognize the end as looking to be URL encoded, let’s set up CyberChef to try to handle it. First, I put UGV0ZSBvbiBTb2Z0d2FyZQ%3D%3D in the input. It will immediately appear – unchanged – in the output because “Auto Bake” is selected at the bottom of the center column. If it isn’t, either check it or click Bake! to see something in the output. Next, let’s search for URL Decode in the search box and drag URL Decode to the Recipe column. After baking, you see that the output now says UGV0ZSBvbiBTb2Z0d2FyZQ== because each %3D was converted to an =. We now see that this looks like a base64 string.
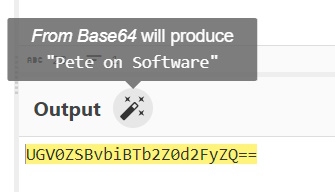
What is interesting is that CyberChef figured that out, too! You’ll notice that a magic wand appeared by the Output header and if you hover on it, it tells you that this is a Base64 string and what the decoding is.
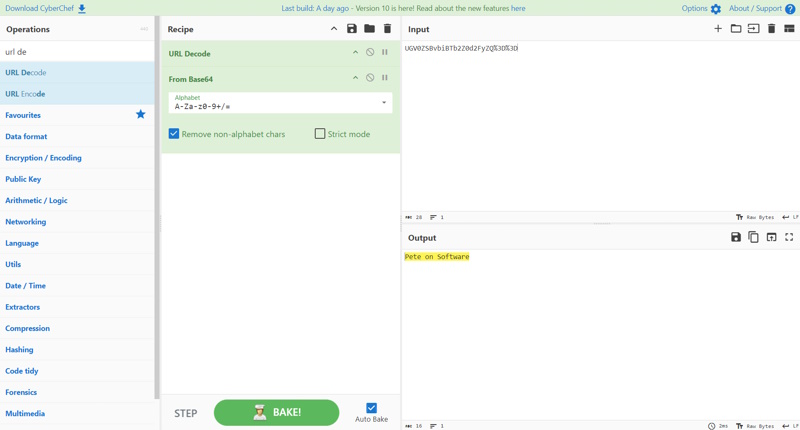
If you click it, it adds From Base64 to the recipe and our output now shows Pete on Software.
It is important to note that order matters. You can drag the recipe steps up and down to perform them in a different order. If I From Base64 first and URL Decode second, we don’t get the exact right answer. If this was a more complicated recipe, small errors get compounded and might make this fail entirely.
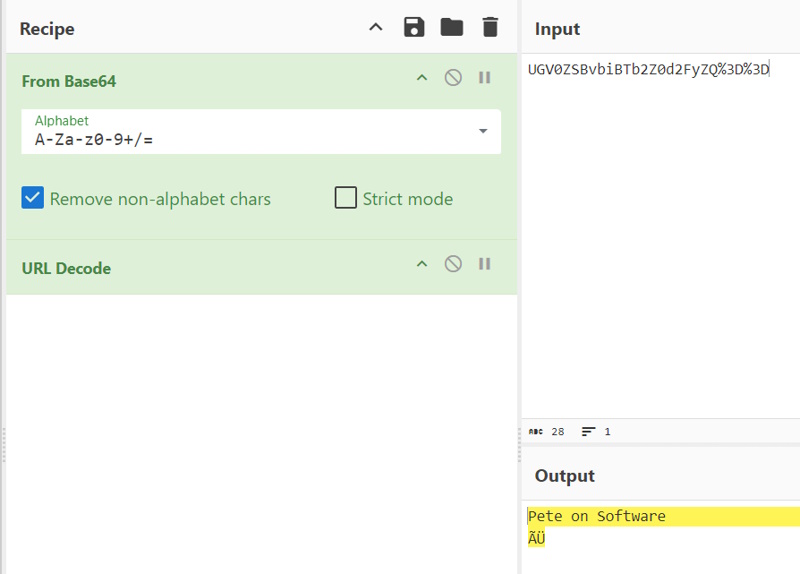
As we move forward, it is important to note that you can remove a recipe step by either clicking and dragging it to the trash can in the upper right portion of the Recipe column, or by clicking the ⊘ on the operation. That will disable it. Clicking that symbol again will re-enable it.
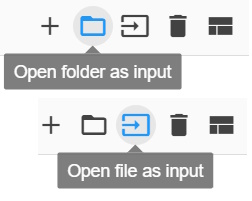
By now, you can imagine all of the things you can do to text. CyberChef has encryption, hashing, encoding, and much, much more. However, you aren’t limited to text. You can perform network operations and even operate on Files. If you don’t enter text in the Input section, you have other options for input. If you hover on each of the icons, you can see that you can also open a Folder or a File as input.
I’m going to use CyberChef to remove EXIF data from an image of a moped. To start, here is the EXIF data that is on the image.
$ exif moped.jpg
EXIF tags in 'moped.jpg' ('Motorola' byte order):
--------------------+----------------------------------------------------------
Tag                 |Value
--------------------+----------------------------------------------------------
X-Resolution        |72
Y-Resolution        |72
Resolution Unit     |Inch
Date and Time (Origi|2018:11:08 19:49:33
User Comment        |Screenshot
Pixel X Dimension   |640
Pixel Y Dimension   |641
Exif Version        |Exif Version 2.1
FlashPixVersion     |FlashPix Version 1.0
Color Space         |Internal error (unknown value 65535)
--------------------+----------------------------------------------------------
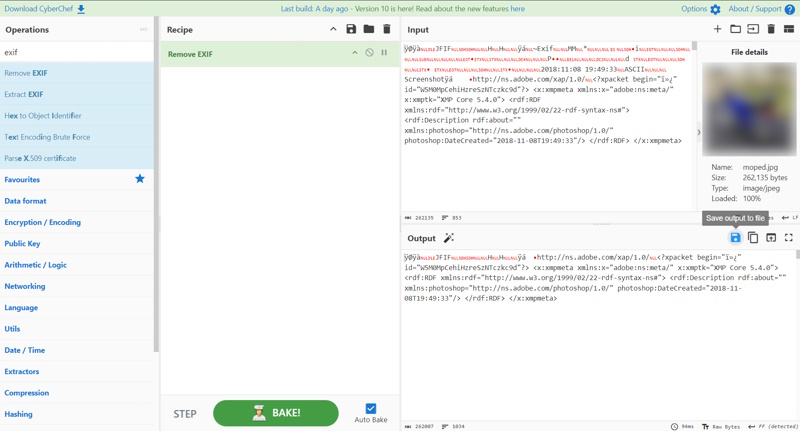
I selected my file as input, added the Remove EXIF operation to the Recipe, made sure it Baked and I have file data in the output. If you click the Floppy Disk icon, you can save that output to a file. (Note: CyberChef didn’t blur the image. I did for privacy reasons)
$ exif moped_cyberchef.jpg
Corrupt data
The data provided does not follow the specification.
ExifLoader: The data supplied does not seem to contain EXIF data.
I will note that I was using a Linux utility to read that EXIF data, but CyberChef could have read the data in the first place. There is an Extract EXIF operation that you can add to the recipe.
As we wrap up, there are some things to consider. First, CyberChef is a client-side application. When you enter input (text, file, folder, etc), your data does not leave the browser. All of the recipes are written in JavaScript and are executed on the client. You don’t have to worry that some agency is getting your encryption keys, pictures, or other sensitive data. As a reminder, the code is open source and can be viewed and reviewed. Also, you don’t have to be online to use CyberChef. There is a download link at the top left that will let you download a ZIP file of the application to run locally. When you click the link, you get a popup that provides this message. It is important to note that this isn’t an installed application and there is no provision for keeping it updated unless you create those means.
CyberChef runs entirely within your browser with no server-side component, meaning that your Input data and Recipe configuration are not sent anywhere, whether you use the live, official version of CyberChef or a downloaded, standalone version (assuming it is unmodified).

There are three operations that make calls to external services, those being the 'Show on map' operation which downloads map tiles from wikimedia.org, the 'DNS over HTTPS' operation which resolves DNS requests using either Google or Cloudflare services, and the 'HTTP request' operation that calls out to the configured URL you enter. You can confirm what network requests are made using your browser's developer console (F12) and viewing the Network tab.

If you would like to download your own standalone copy of CyberChef to run in a segregated network or where there is limited or no Internet connectivity, you can get a ZIP file containing the whole web app below. This can be run locally or hosted on a web server with no configuration required.

Be aware that the standalone version will never update itself, meaning it will not receive bug fixes or new features until you re-download newer versions manually.
That’s it! I hope you got a good introduction to CyberChef and keep it in mind when you have little needs to manipulate data. If there is anything that you have found very handy to use it for or any good tips and tricks, I’d love to hear about it in the comments.