 In today’s development landscape, dependency management is becoming an increasingly important problem to solve. As applications incorporate more and more external libraries (especially very active open source libraries), making sure that your application has the most up-to-date versions of those libraries becomes more tedious. Add in the necessity to make sure that every one of your dependencies has its dependencies met, you are definitely facing a headache.
If you come to Objective-C and iOS development from other languages, you might already be familiar with the solutions that those ecosystems provide. In .Net there is NuGet, Ruby has Gems, Node has NPM, etc. In Objective-C, the most popular dependency management system is CocoaPods.
CocoaPods is made with Ruby and you can get started with it with the version of Ruby that is on the Mac by default. All you have to do is type “sudo gem install cocoapods” (without quotes) in the terminal, enter your password, and you are off and running.

The terminal will just sit and wait for awhile during the install. Unlike Homebrew, you don’t get any feedback during the installation. When it is finished, you will get a bunch of text for the change log for the version that you just installed and – if all went well – it will conclude with this message (the version could vary based on what is current when you are doing your install):
Successfully installed cocoapods-0.29.0
Parsing documentation for cocoapods-0.29.0
1 gem installed
After that, CocoaPods is ready to use.
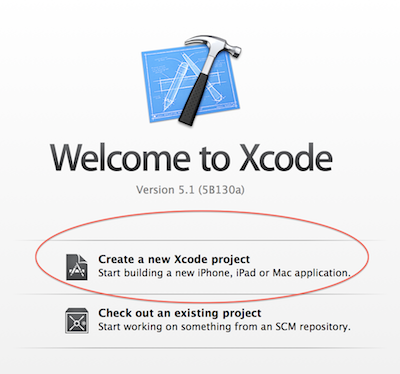
For the first step, we need to have to make a new project (or use an existing project). Since we are starting fresh and new, I’ll just make a new project. I’m going to open Xcode and make a new project:
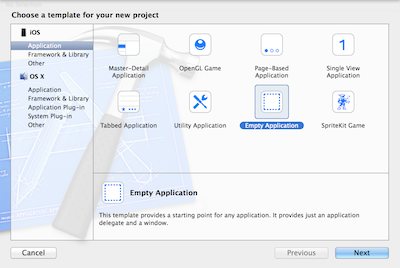
Then, I’m going to choose “Empty Application” and click next. (Note: you might see different options here based on what you configurations or installations you have on your machine.
Then, we can fill out a little information about our application and click Next again. After that, choose somewhere to save it and finish up:
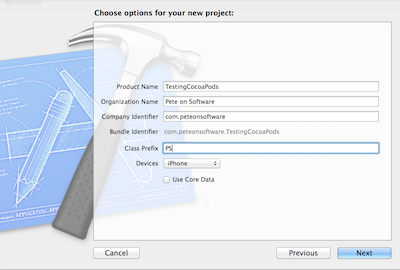
After your project opens, go ahead and shut down Xcode. You are never going to intentionally directly open that .xcodeproj file again.
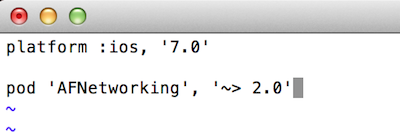
Open the terminal and navigate to the directory where you saved your project. First, we’ll create a podfile. A podfile is just a text file that keeps track of what dependencies you are taking and a list of the versions that you are willing to accept. We are just going to make a very simple podfile and take a dependency on AFNetworking, a very popular Objective-C networking client.
With your terminal active in your project’s directory, just type “touch Podfile”. That will make a podfile (no extension) in your directory. Then, you can edit that file in your favorite text editor. If you want to stay in the command line, you can type “vim Podfile” and then press i to go into insert mode. Then add the following text, followed by the key combination of Esc, then colon, then wq then . This will take you back to your terminal.
The file contents:
platform :ios, '7.0'

pod 'AFNetworking', '~> 2.0'
Here are those steps visually:

Type pod install and your pods will be installed and configured*

If you look at the project directory in Finder, you will now see that files and folders have been added.
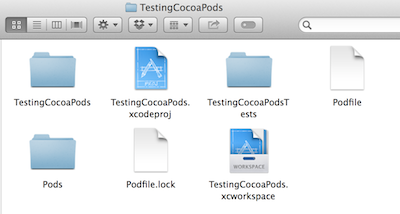
The file that you care the most about now is the .xcworkspace file. If you are familiar with .Net, the .xcworkspace file is like the .sln file and the .xcodeproj file is like the .csproj or .vbproj files. The way that CocoaPods works, it makes your Pods code its own project and your existing code stays its own project and the .xcworkspace encompasses them both. As I mentioned earlier, from now on, don’t open your .xcodeproj file, but instead have Xcode open the .xcworkspace.
I find it handy to go File -> Open Recent -> Clear Menu from the Xcode menu so that my .xcodeproj file is removed from recent files and I don’t accidentally open it. Then, I can either double click on the .xcworkspace or choose “Open Other…” from the Xcode launch screen.
Now that the workspace is launched, you can see that the CocoaPods have been added to your code. Now you are able to import the header files into your code files and use your imported libraries as if they had always been there.
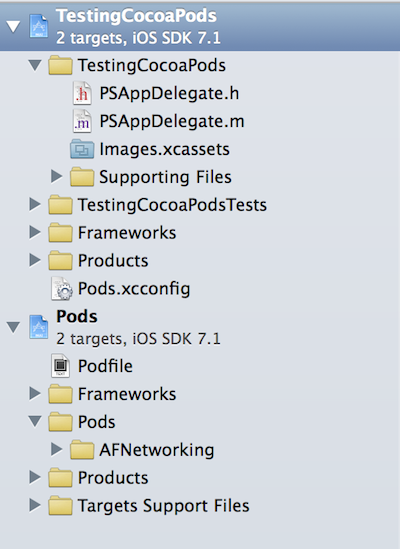
It might seem like we did a lot of steps to get to this point, but that was only because we had to include the initial CocoaPods gem installation. From now on, you just need to add a completed Podfile to your project directory, run pod install and then use the workspace from then on.
If you are the kind of person who likes to watch to learn rather than just read, you can check out a FREE video available over at NSScreencast about CocoaPods. Happy Podding!
* If you have an error when you run pod install, check out this StackOverflow, it solved my issue caused by a bad update to Cocoapods.
 This time, in Episode 23, I recap the September 2014 Apple Launch Event. During this event, Apple launched iPhone 6 and 6 Plus, along with Apple Pay and Apple Watch. I wasn’t really enthusiastic for this event going in because I don’t like big phones, I couldn’t care less about NFC payments, and I’m not excited about wearables. However, by the end of the presentation, I was excited for 2/4 of the products. Either I’m a sucker for marketing, or some of this stuff might actually be pretty good. Listen and find out which it is.


 In today’s development landscape, dependency management is becoming an increasingly important problem to solve. As applications incorporate more and more external libraries (especially very active open source libraries), making sure that your application has the most up-to-date versions of those libraries becomes more tedious. Add in the necessity to make sure that every one of your dependencies has its dependencies met, you are definitely facing a headache.


